Hi 👋,
In this short article I want to showcase how I implemented a custom HomeKit accessory with python.
My Home Assistant’s SD card died 🪦 a few days ago and the support for GPIO based sensors will be removed in newer releases. This makes it unsuitable for my needs, while giving me the perfect opportunity to try other things.
To continue monitoring temperature and humidity in my home I’ve built a custom HomeKit accessory with HAP Python.
The Sensor
A BME680 air quality sensor is used to monitor temperature and humidity. It is connected to the PI according to the following diagram:
 The communication with the Pi is done using the I2C protocol. If you want to use I2C in your own setup, it has to be enabled using raspi-config, as it doesn’t come enabled by default.
# Execute
sudo raspi-config
# Then select Interfacing options->I2C and enable it.
Connection can be tested with the following command:
sudo apt-get install build-essential libi2c-dev i2c-tools python-dev libffi-dev git
/usr/sbin/i2cdetect -y 1
pi@raspberrypi:~ $ i2cdetect -y 1
     0  1  2  3  4  5  6  7  8  9  a  b  c  d  e  f
00:                         -- -- -- -- -- -- -- --
10: -- -- -- -- -- -- -- -- -- -- -- -- -- -- -- --
20: -- -- -- -- -- -- -- -- -- -- -- -- -- -- -- --
30: -- -- -- -- -- -- -- -- -- -- -- -- -- -- -- --
40: -- -- -- -- -- -- -- -- -- -- -- -- -- -- -- --
50: -- -- -- -- -- -- -- -- -- -- -- -- -- -- -- --
60: -- -- -- -- -- -- -- -- -- -- -- -- -- -- -- --
70: -- -- -- -- -- -- 76 --
It will output the address that the sensor is using, in our case the 0x76 I2C address.
The Code for the Accessory
You can browse the full code for the accessory and bme680 sensor in my git repo.
To run the program, clone the repository and ensure that you’re running it under the pi user, otherwise you will need to change some things.
cd /home/pi && git clone git@github.com:dnutiu/bme680-homekit.git && cd bme680-homekit
sudo apt-get install libavahi-compat-libdnssd-dev
pip3 install -r requirements.txt
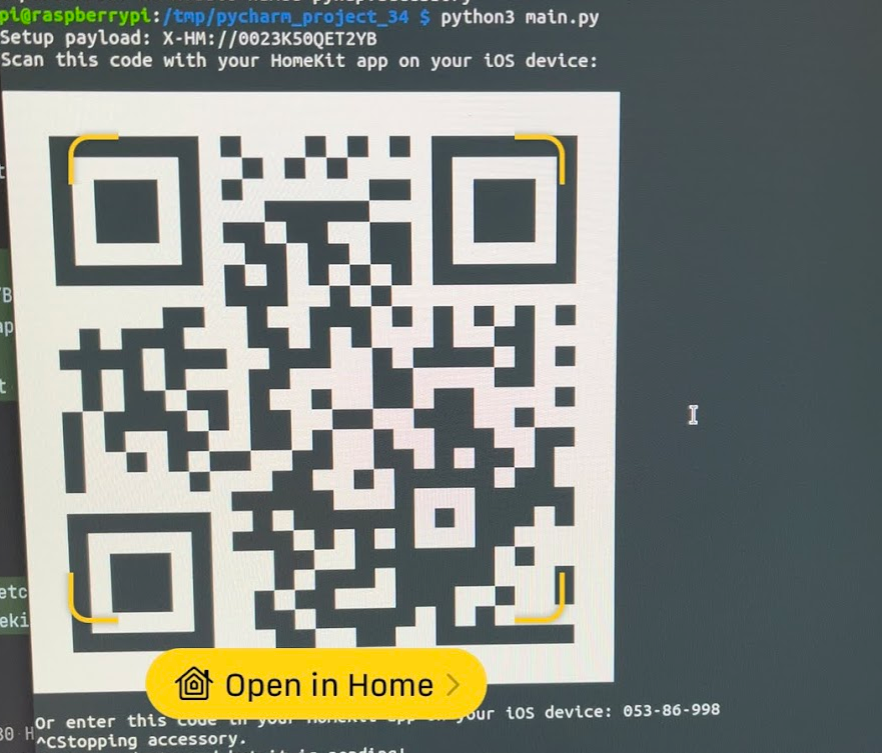
Verify that the program works by running python3 main.py. Running it the first time will prompt you to add the accessory to the Home app. If you miss this step you can repeat it by deleting the accessory.state file located in pi’s home directory and by running the program again.
 After you’ve verified that it works, you can setup a systemd service to run the accessory’s python script when the PI boots
Copy the bme680-homekit.service to /etc/systemd/system and check that the service is running.
sudo cp bme680-homekit.service /etc/systemd/system
sudo systemctl status bme680-homekit
If you want to run this under another user rather than the pi, you’ll need to tweak the bme680-homekit.service file.
Congratulations for making it this far! 🎉
You can browse more code examples in the HAP-Python repository.
Thanks for reading and have fun! 👩💻👨💻 ⚙️