Hello,
In this article I will introduce you to pyenv, a tool for managing python environments.
Installing pyenv is pretty straight forward, you’ll need to clone the repo and add the binaries to the path.
For a typical Debian based distro using the Zsh shell the instructions would be:
| |
Then, in order for this to take effect, you need to reload the shell with: source ~/.zshrc, or just restart your terminal. 😀
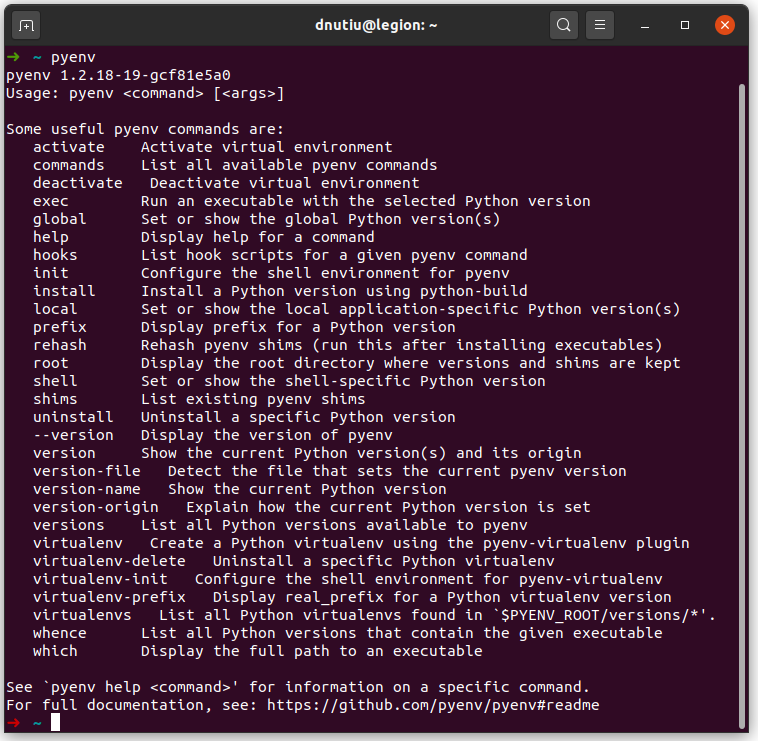 For the full installation instructions and shell auto completion refer to: Installation
Basics
While that’s enough to use Pyenv, I also like to install the pyenv-virtualenv plugin, to manage my Python virtual environments. Please refer to the Installation Instructions.
Note: If you use Zsh you can add pyenv to your plugins in .zshrc in order to have command autocomplete, it also loads pyenv-virtualenv.
To list all the available python versions we can run:
| |
Before installing one, we need to download all the python dependencies for our system, if we don’t do that, the Python compilation will most likely fail.
For a Debian based Linux distro the following command should work:
| |
For other distros and macOS please refer to: Suggested build environment
When all the dependencies are met, we can install the desired Python version with: pyenv install 3.9-dev or any other Python version.
 We can list our installed python versions with:
 pyenv versions.
I have previously installed python-3.8.3 and created a virtual environment from it. I’ll explain this later.
 To use our newly installed Python version we have two options:
- Use it globally: pyenv global 3.9-dev
- Use it locally: pyenv local 3.9-dev
Global usage means that pyenv will use bash magic. When you type python, the configured Python version will be used, if and only if there’s no local version configured.
Local versions are configured per directory basis, which means that if you are in a project’s root folder and you set the version to 3.9-dev, when typing python in the project’s root or nested directories, the local version (3.9-dev) will be used instead of the global one.
For example:
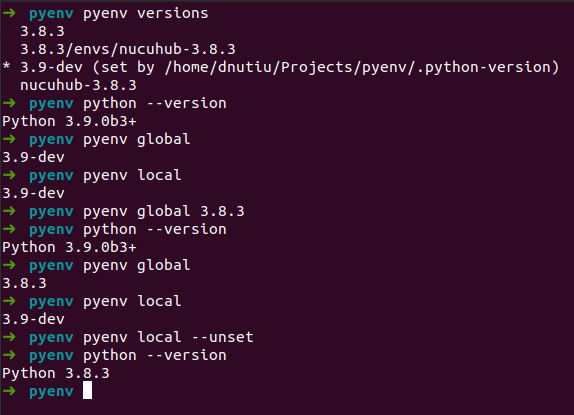 To query the global/local version use pyenv global (or local) without any arguments. To unset the local version use pyenv local –unset.
What we’ve learned so far is that we can carelessly use any python version side by side, without breaking our system, and we can switch between them using a simple command.
Pyenv is also extremely generous, as we can chose between 425 python versions, all of which can be installed with as single command.
➜ pyenv pyenv install -l | wc -l
425
You can also chose to run two global python versions at the same time, this is useful when you need tools written in Python that are distributed as pip packages. One tool that I can think of is docker-compose.
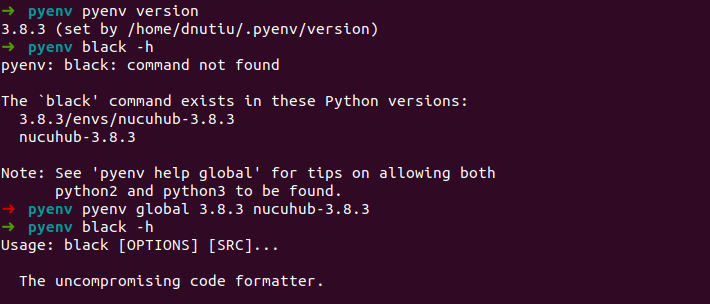 This offers you great flexibility.
Virtual Environments
A problem that arises when working as a Python developer is that often you are working on multiple projects at once.
We can use python 3.8.3 for two projects, but if a project requires and older MongoDB package and another one requires the newer package to work we have a problem, as we can’t have two versions installed at the same time.
This is where virtual environments and pyenv-virtual plugin comes into play.
We can easily create a new virtual environment with the following command, the first argument being the ‘parent’ and the second argument being the virtual environment name.
pyenv virtualenv 3.9-dev experimental-3.9-dev
 We can then use the virtual environment locally with:
pyenv local experimental-3.9-dev
 If we no longer need a version we can uninstall it with one command:
pyenv uninstall experimental-3.9-dev
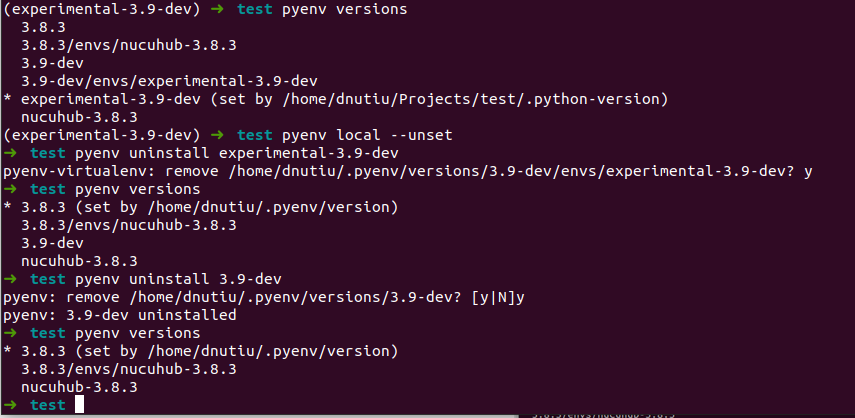 Before ending this article I want to show you how to use the a pyenv Python version in Pycharm.
 When creating a new Project -> Pure Python -> Virtual Environment -> Click on the dots -> Virtualenv Environment -> Click on the dots -> Find your pyenv version usually in: /home/user/.pyenv/versions -> Select /bin/python and press Ok 🙂
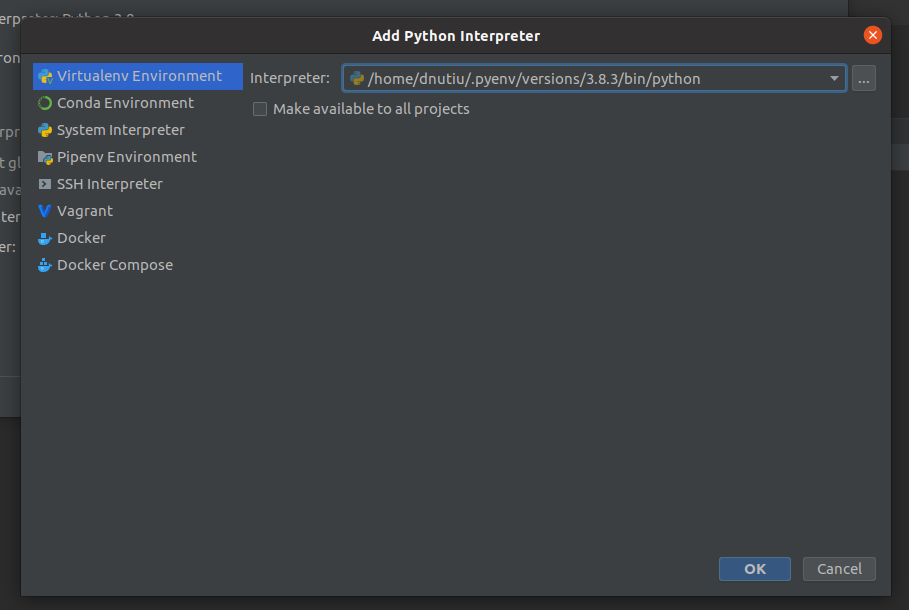 On an existing project, press SHIFT twice and type Python Interpreter.
That’s it! I hope you enjoyed this article.